Getting Fit for Trekking in Nepal
A complete, honest guide to preparing your body and mind for the Himalayas
It is a fair question, and it deserves an honest answer rather than the vague reassurances that fill most trekking websites. So here it is: you do not need to be an athlete. You do not need to be running half-marathons or climbing in the Alps every weekend. But you do need to prepare seriously, consistently, and specifically for what Nepal’s trails will ask of you. The difference between preparation and no preparation is not just comfort — it is the difference between completing your trek and being evacuated off it.
Nepal’s major trekking routes — Everest Base Camp, Annapurna Circuit, Langtang Valley, Manaslu Circuit, Ghorepani Poon Hill — cover enormously varied terrain across altitude ranges that go from 800 meters above sea level to over 5,500 meters. Most popular routes involve five to eight hours of walking per day, carrying a pack, on consecutive days, at altitudes where the air contains significantly less oxygen than your lungs are used to. That is the reality. The good news is that with the right preparation, these same trails are within reach of everyday people of all ages and fitness backgrounds.
This guide gives you exactly what you need to know: the fitness demands of Nepal trekking, the training methods that work, the altitude realities that no amount of gym time fully prepares you for, and the mindset that turns a hard day on the trail into one of the best experiences of your life. No false promises. No glossy oversimplification. Just the actual preparation that gets you there and brings you home having finished what you started.
How Fit Do You Actually Need to Be?
The first thing to understand is that fitness for Nepal trekking is not the same as general fitness. Someone who goes to the gym five times a week and lifts heavy may struggle on a long descent after six hours of walking if they haven’t built trail-specific endurance. Someone who walks regularly and has good cardiovascular conditioning may handle the same descent with ease. The type of fitness matters as much as the quantity.
The core physical demands of Nepal’s most popular trekking routes are these: the ability to walk continuously for five to eight hours per day, typically carrying a daypack of five to eight kilograms, over mixed terrain that includes stone staircases, dirt paths, rocky ridgelines, and river crossings. You need to be able to do this not once, but on consecutive days for the duration of your trek — which ranges from four days on the shorter routes to three weeks or more on the Annapurna Circuit or Three Passes Trek.
Add altitude into this picture. Above 3,500 meters, your body is operating in an environment where oxygen levels have dropped significantly compared to sea level. Your heart rate increases for the same effort. Breathing becomes noticeably harder. Recovery between exertion periods takes longer. A cardiovascular system that is already conditioned will adapt to altitude faster and handle the demands of thin air with far less suffering than a body that arrives untrained.
The honest benchmark is this: if you can comfortably walk uphill for three to four hours carrying a loaded pack without stopping every ten minutes, and then do it again the next day with reasonably fresh legs, you have the baseline fitness for the easier Nepal routes. For routes like Everest Base Camp or Annapurna Circuit, extend that to five to six hours, add significant elevation gain, and multiply it over two weeks. That is your target. Train toward it.
When to Start Training — and Why Earlier Is Always Better
The most common mistake trekkers make is starting their preparation too late. Six weeks before departure is not preparation — it is damage limitation. Genuine physical adaptation, the kind that makes you comfortable on trail rather than just capable of surviving it, requires months of consistent training.
For trekkers who are currently inactive or only mildly active, six months of preparation is the right target. This gives your body time to build an aerobic base, adapt to carrying a pack, develop the specific leg strength that descending steep trails demands, and identify and address any weak points — tight hips, weak knees, poor ankle stability — before you’re standing on a trail four days from the nearest road.
For trekkers who already exercise regularly, three to four months of focused, trek-specific training is usually sufficient. The key word is trek-specific. Running on a flat road is better than nothing, but it is not the same as walking uphill with a weighted pack. Cycling builds cardiovascular fitness but does not prepare your legs for the eccentric loading of long descents. The closer your training resembles what you will actually be doing in Nepal, the more effectively it prepares you for it.
One practical strategy that works particularly well: book your trek first, then start training. Having a fixed departure date and a paid itinerary creates accountability that generic fitness intentions rarely generate. When you know the date, you can count backwards and build a realistic plan around it.
The Foundation: Hike More. Then Hike Even More.
The most effective training for Nepal trekking is hiking. This sounds obvious, and it is, but it is worth stating clearly because many trekkers default to gym-based training as their primary preparation when the trail itself is the best teacher. If you have access to hills, forests, or any terrain with elevation change, use it regularly.
Start with what you can manage. If you are not currently hiking, an hour to ninety minutes on moderate terrain once or twice a week is the right entry point. After three to four weeks of consistent effort, your body will begin to adapt — your legs will feel less heavy on climbs, your breathing will settle into a rhythm, and the post-hike fatigue will diminish. That is when you increase duration and introduce a loaded pack.
The pack makes an enormous difference and cannot be skipped. Carrying ten to fifteen kilograms shifts the load onto your hips, lower back, and shoulders in ways that unloaded walking never replicates. It changes your gait, your balance, and the demands on your cardiovascular system. Start with sixty to seventy percent of your intended pack weight and build toward the full load over six to eight weeks.
Once you have been hiking consistently for a few months, the most Nepal-specific training you can do is back-to-back long days. Go for a four to five hour hike with a full pack on Saturday, then go again on Sunday. Your body’s response on the second day — the slightly heavier legs, the slower start, the way the pack feels by hour three — is a direct simulation of what multi-day trekking in Nepal feels like. Do this at least twice before you depart. It will either confirm you are ready or tell you what still needs work.
What a Good Hiking Training Week Looks Like
A realistic structure for the final eight to ten weeks before departure looks something like this. Three to four days of active training, with one or two rest days and one or two lighter recovery days. Monday might be a brisk uphill walk of sixty to ninety minutes. Wednesday adds strength work (covered in the next section). Thursday is a moderate hike or stair session of two to three hours with a partial pack. Saturday is your long training hike — four to six hours, full pack, as much elevation as you can find. Sunday is rest or a gentle recovery walk.
The long Saturday hike is the most important session of the week. Do not skip it, do not cut it short, and do not replace it with a gym session. Everything else in your training week exists to support this one session getting progressively longer and harder over the training block.
Strength Training: What Your Legs Actually Need
One of the most persistent misconceptions about Nepal trekking is that ascending is the hardest part. It is not. Descending is harder — significantly harder — on your body. When you walk downhill, your quadriceps work eccentrically to control each step, absorbing three to four times your body weight through the knee joint with every footfall. After six hours of descent on Nepal’s rocky trails, untrained quads give out. Knees start aching. Ankles roll. The trail that looked manageable from the top becomes an ordeal by the bottom.
Strength training addresses this directly. You do not need a gym membership or complex equipment. Bodyweight exercises done twice a week, consistently over several months, will build the quad and glute strength that makes Nepal’s descents manageable rather than painful.
Essential Exercises for Nepal Trekking
Squats
Stand with feet shoulder-width apart, chest up, weight through the heels. Lower until thighs are parallel to the floor, then drive back up. This is the fundamental quad-building exercise for trekking. Start with three sets of twelve reps. When this becomes straightforward, add a weighted pack on your back. The goal is not maximum weight — it is controlled, full-range movement that trains the muscles across the full depth of a step.
Reverse Lunges
Step backward with one foot, lowering the back knee toward the floor. Drive back up through the front heel. Reverse lunges place more emphasis on the glutes and are easier on the knee than forward lunges for most people. Three sets of ten per leg. When you are strong enough, do these on a step with the back foot lower to increase range of motion.
Step-Ups
This is the most directly trail-relevant strength exercise you can do. Find a step, box, or sturdy surface at knee height. Step up with your right foot, drive the left knee up to hip height, lower back down slowly. The slow lowering phase is what builds the eccentric quad strength that protects your knees on descent. Three sets of twelve per leg, with a pack once you are comfortable with the movement.
Wall Sits
Back against a wall, thighs parallel to the floor, hold for thirty to sixty seconds. This is a static endurance exercise that builds the quad stamina for sustained downhill effort. Start with three holds of thirty seconds and build to ninety seconds per hold. Simple, effective, and can be done anywhere without equipment.
Single-Leg Deadlifts
Stand on one leg, hinge forward at the hip keeping the back flat, lower toward the floor. This builds the hamstring strength and ankle stability that prevents the lateral ankle rolls that are among the most common trail injuries. Three sets of eight per leg. Use a wall or trekking pole for balance until the movement pattern is familiar.
Planks and Core Work
A strong core is what keeps your posture upright after hour five of carrying a pack. Front plank, side planks, and dead bug variations done for thirty to sixty seconds each, three times per week, are sufficient. Core training for trekking is about endurance not strength — the ability to maintain a neutral spine position for hours, not the ability to generate force in a single effort.
Cardiovascular Training: Building the Engine
Your cardiovascular system is what carries you up the Himalayan passes. A well-conditioned heart and set of lungs manage altitude more efficiently, recover between exertion bursts faster, and allow you to maintain a steady pace on long uphill sections without the gasping, stopping, and starting that characterises the underprepared trekker.
Any sustained aerobic activity builds this capacity: running, cycling, swimming, rowing, or using a stair climber. The specific activity matters less than the consistency and the duration. Three to five cardio sessions per week of thirty to sixty minutes each is the target. One of those sessions each week should be longer and at lower intensity — sixty to ninety minutes at a pace where you can hold a conversation. This trains the aerobic base that sustains multi-hour effort.
Stair climbing deserves special mention because it is the closest urban-available simulation of Nepal’s terrain. Find a building with multiple floors and do continuous stair repeats — up and down without stopping — for thirty to forty-five minutes. Add a loaded pack once you are comfortable with the effort. It is unglamorous training and it works better than almost anything else for preparing your legs and lungs for Himalayan trail conditions.
Breathing and the Altitude Variable
No amount of cardiovascular training at sea level fully replicates the experience of breathing at 4,500 meters. This is not a reason to skip cardio preparation — it is simply an honest acknowledgement that altitude introduces a variable that training can reduce but not eliminate. The fitter your cardiovascular system, the faster and more comfortably it adapts to reduced oxygen. But the adaptation still has to happen on the mountain, not in advance.
Some trekkers explore altitude simulation through hypoxic masks or training tents, which reduce oxygen intake during exercise. These tools have legitimate use for athletes preparing for high-altitude competition, and they can give trekkers a useful preview of the breathlessness that altitude produces. They are not a substitute for proper acclimatization on the trail, but for those with serious altitude anxiety, they offer some useful preparation.
A more accessible and evidence-backed approach is pranayama breathing — yoga-based breathing techniques that improve lung capacity, train conscious breath control, and help regulate the body’s response to exertion. Practicing diaphragmatic breathing and extended exhale techniques in the months before your trek genuinely helps on trail, particularly during steep sections at altitude where controlled breathing rhythm makes a measurable difference to how quickly you recover between steps.
Altitude Sickness: The Factor Fitness Cannot Fully Control
Every honest guide to Nepal trekking fitness has to address altitude sickness directly, because it is the factor that most undermines trekkers who arrive fit and confident and discover that fitness is not a guarantee of altitude tolerance.
Acute Mountain Sickness occurs when the body ascends faster than it can adapt to reduced oxygen levels. The symptoms — persistent headache, nausea, dizziness, fatigue, and difficulty sleeping — can appear at altitudes as low as 2,500 meters but become significantly more common above 3,500 meters. The critical point: AMS affects fit and unfit people with no reliable correlation to fitness level. Trained mountaineers get it. Recreational trekkers sometimes sail through it. The determining factors are rate of ascent, genetics, hydration, and acclimatization schedule — not gym fitness.
This means that fitness preparation and itinerary planning work together as a system. A well-conditioned trekker on a rushed itinerary is more at risk than a moderately fit trekker on a properly paced schedule. The standard acclimatization guidance — ascend no more than 300 to 500 meters in altitude gain per day above 3,000 meters, with a rest day every two to three days — exists because the physiology is non-negotiable regardless of how hard you trained.
The rules for managing altitude on trail are simple and absolute. Ascend slowly. Hydrate consistently — three to four litres of water per day at altitude, even when you do not feel thirsty. Avoid alcohol and heavy sedatives in the first days at elevation. Never ignore worsening symptoms. If a headache, nausea, or dizziness is getting worse rather than better after a rest day, the only correct response is to descend. Not to wait another day. Not to push on hoping it improves. Descend. The mountain will still be there when you return, properly acclimatised.
Diamox and Medical Preparation
Acetazolamide, commonly known as Diamox, is a prescription medication that accelerates the body’s acclimatization process by stimulating faster, deeper breathing at altitude. Many trekkers use it preventively on routes above 4,000 meters, and it is effective when used correctly. It is not a cure for AMS and does not permit faster ascent than physiology allows — but it reduces the incidence and severity of symptoms for most people who take it.
Consult your doctor before departure to discuss whether Diamox is appropriate for your specific medical history. Also get a full health check if you have any cardiovascular, respiratory, or circulatory conditions, as high-altitude trekking places additional demands on all of these systems. Travel insurance that explicitly covers helicopter evacuation from high altitude is non-negotiable — it is not expensive relative to the cost of the trek and it is the single most important safety net you can purchase.
Nutrition and Hydration: Fuelling Your Training and Your Trek
Training for Nepal trekking places real demands on your body, and how you fuel that training determines how effectively it converts into fitness. The basic principle is straightforward: adequate protein to support muscle repair and growth, sufficient carbohydrates to fuel training sessions and recovery, and enough vegetables and whole foods to support immune function and general health. No exotic supplements, no extreme dietary protocols — just consistent, balanced eating in volumes that reflect your increased training load.
Protein deserves specific emphasis for trekking preparation. Your muscles are being broken down and rebuilt throughout your training block, and they need adequate protein to rebuild stronger. Aim for 1.4 to 1.8 grams of protein per kilogram of bodyweight per day during periods of heavier training. This is easily achievable through regular meals that include eggs, legumes, meat, fish, dairy, or plant-based protein sources — no powders or supplements required unless dietary restrictions make whole food sources difficult.
On the trail itself, nutrition simplifies dramatically. Nepal’s teahouses serve dal bhat — lentils and rice — as the staple trekking meal, and it is genuinely excellent fuel: high carbohydrate, adequate protein, easy to digest, and available at almost every stopping point on the major routes. Many experienced guides recommend ordering dal bhat over Western menu options at high altitude because local staple foods are fresher, easier to prepare at altitude, and exactly what your body needs for sustained daily effort.
Hydration on trail cannot be overstated. Altitude increases fluid loss through increased respiration, and the dry Himalayan air accelerates it further. Three to four litres of water per day is the realistic minimum above 3,500 meters — more on days with significant elevation gain. Dehydration is one of the primary and most preventable contributors to altitude sickness. Drink consistently throughout the day rather than in large volumes at rest stops. Water purification tablets or a filter system are essential on any route where stream or tap water is your source.
Mental Preparation: The Part Nobody Talks About Enough
Physical fitness gets far more attention in Nepal trekking preparation guides than mental fitness, which is a significant gap because the mental demands of multi-day high-altitude trekking are real and specific.
The most challenging days on Nepal’s tough trails are not always the highest altitude days or the longest distance days. Sometimes they are the grey, cold mornings when you are tired from cumulative effort, the weather is closing in, and the remaining distance looks daunting. The trekkers who handle these days well are not necessarily the fittest — they are the ones who have realistic expectations, a stable relationship with discomfort, and the mental habit of focusing on the next step rather than the total remaining distance.
Realistic expectations are the foundation of mental preparation. Nepal’s trails are not always comfortable. Teahouses vary enormously in quality. The food at altitude is limited in variety. Some days are cold and wet and exhausting. The views that fill the brochures are weather-dependent and not guaranteed. Trekkers who arrive expecting consistent comfort and guaranteed conditions consistently struggle more with the hard days than those who arrive expecting a genuine adventure with everything that word actually implies.
The specific mental practice that helps most on trail is learning to reduce your timeframe to the immediate. When the day feels overwhelming, stop projecting to the final destination and focus on the next teahouse, the next rest stop, the next visible bend in the trail. Nepal’s trails are made manageable one section at a time. The guides who have walked these routes hundreds of times still operate this way — not because they lack the fitness to think ahead, but because present-moment focus is genuinely more effective than anxious projection over long distances at altitude.
Train in Your Gear — Not Just Your Body
Gear failure on Nepal’s trails is usually a preparation failure in disguise. Blisters that come from unbroken-in boots. Shoulder pain from a pack that was never properly fitted. Hypothermia risk from base layers purchased the week before departure and worn for the first time on the trail. These are not bad luck — they are the predictable consequences of skipping the step of training in your actual gear before you need it in the mountains.
Your trekking boots are the most critical item and the one that demands the longest lead time. Buy them at least eight weeks before departure and wear them on every training hike from that point forward. New boots need to conform to the specific shape of your feet, soften at the flex points, and break in through actual walking — not through wearing them around the house. Every kilometre you put on them before Nepal is a kilometre of potential blisters that do not happen on trail.
Your pack needs the same treatment. Have it professionally fitted at an outdoor equipment store — the hip belt position, shoulder strap angle, and load lifter adjustment all affect how the pack distributes weight. A correctly fitted pack on your body prevents the shoulder, neck, and lower back pain that plagues trekkers carrying poorly adjusted loads. Once it is fitted, wear it loaded on your training hikes so your body adapts to the specific contact points and pressure distribution before you are spending nine hours a day in it.
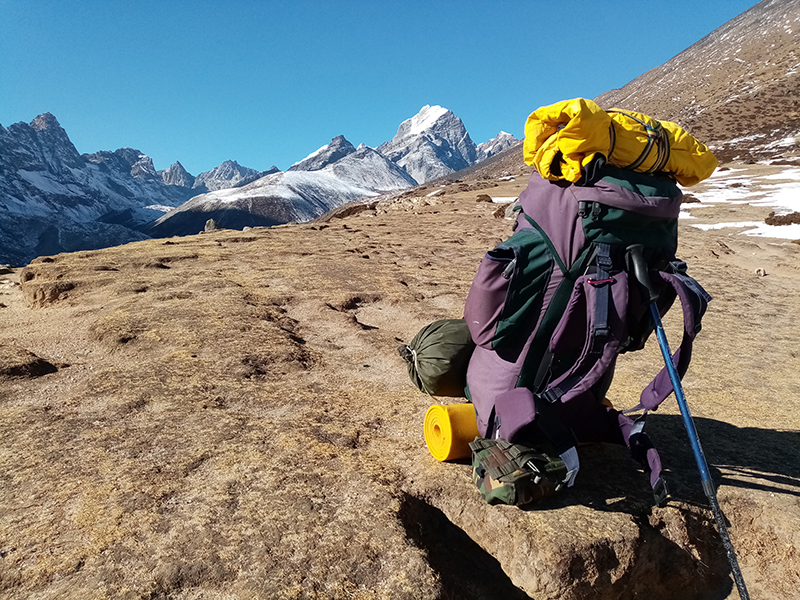
Trekking poles deserve special consideration for any route with significant elevation gain or descent. They reduce impact on the knees by measurably reducing the load on each downhill step, improve stability on uneven terrain, and become genuinely valuable tools at altitude where balance can be subtly affected by reduced oxygen. If you plan to use poles in Nepal — and for most multi-day routes, you should — practice with them on your training hikes. Their use is a skill that takes a few sessions to feel natural.
Your 12-Week Training Timeline
The following is a realistic preparation structure for someone starting from a moderate baseline of general fitness. Adjust the starting intensity up or down based on your current activity level, and extend the preparation period to six months if you are currently inactive.
Weeks 1 to 3: Building the Base
The focus in the opening weeks is establishing daily movement as a non-negotiable habit. Three to four walks per week of forty-five to sixty minutes each, at brisk pace on whatever terrain is available. Add two short strength sessions using the bodyweight exercises outlined above — squats, lunges, step-ups, planks. Keep intensity moderate. The goal at this stage is consistency, not effort. Your body is adapting to regular loading after a period of less activity, and pushing too hard too early increases injury risk and reduces the training you can sustain over the full preparation block.
Weeks 4 to 6: Introducing Load and Incline
Start carrying a pack on your walks. Begin with thirty to forty percent of your expected trek pack weight and build toward sixty percent by the end of this phase. Add incline wherever possible — hills, staircases, treadmill elevation. Extend your weekly long session to two to three hours. Increase your strength training sets and repetitions. If you are not already doing stair work, add one stair-focused session per week of thirty minutes. Start tracking how your body feels at the end of training sessions — fatigue levels, recovery speed, and any persistent soreness are all useful data points for adjusting your plan.
Weeks 7 to 9: Building Trek-Specific Endurance
This is the core of your preparation. Your long weekly hike extends to three to four hours with a full pack. Strength sessions become more challenging — heavier loads, single-leg variations, longer wall sit holds. Add a second medium-length hike of two hours during the week. Introduce your first back-to-back weekend: a four-hour hike Saturday, a two to three hour hike Sunday. Notice how your legs feel on Sunday morning. If they feel genuinely tired, that is the simulation working. If they feel comfortable, increase Saturday’s duration or load.
Weeks 10 to 11: Peak Training
The longest and most demanding weeks. At least one long hike of five to six hours with a full pack. One back-to-back weekend of four hours each day. Three strength sessions per week. Your body should feel conditioned but not overtrained — some fatigue is appropriate, pain is not. This is also the period to finalise all gear, complete any medical appointments, and ensure your boots have sufficient kilometres on them.
Week 12: Taper and Rest
Reduce training volume by thirty to forty percent in the final week before departure. Continue walking and light activity but drop the intensity and duration significantly. Your body consolidates the fitness adaptations made over the previous eleven weeks during this rest period — cutting taper short means arriving in Nepal with accumulated fatigue rather than fresh legs. Sleep well, eat well, hydrate consistently. Arrive rested.
The Right Mindset Going In
There is one last thing worth saying about preparing to trek in Nepal, and it has nothing to do with squats or heart rate zones. Nepal’s trails will humble you. They will do it regardless of how well you prepared, how fit you are, or how many mountains you have walked before. The Himalayas are simply bigger than any individual’s fitness level, and the most experienced trekkers who have walked these routes multiple times will tell you the same thing: you never stop being impressed by what the mountains require of you.
That humility is not a reason not to prepare. It is a reason to prepare well and then surrender to the experience with genuine openness. The trekkers who enjoy Nepal’s tough trails most are not the ones who overpower them. They are the ones who are prepared enough to be present for them — who can absorb the landscape, connect with the culture, and push themselves to the edge of their capacity without being overwhelmed by it.
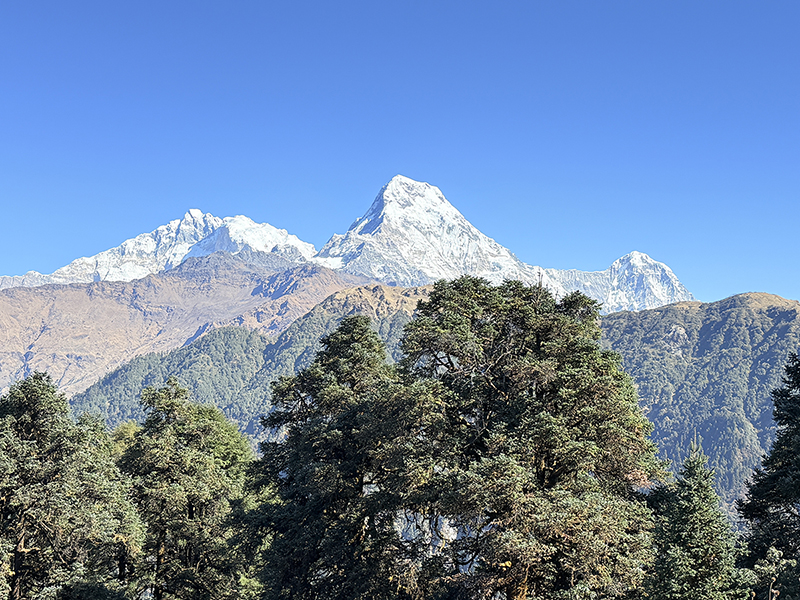
Train hard. Pack smart. Go slowly. Drink water. Listen to your body. And when the clouds clear and the Annapurna range or the Khumbu icefall appears in the morning light in front of you, all of the preparation will have been entirely worth it.
Plan Your Nepal Trek with Getaway Nepal Adventure
Getaway Nepal Adventure designs and operates trekking programs across all of Nepal’s major routes — for individuals, groups, families, and international teams. Every itinerary is built with proper acclimatization schedules, expert local guides, and the deep route knowledge that only comes from years of experience in these mountains.
- All fitness levels welcome — from first-time trekkers on Ghorepani Poon Hill to experienced hikers targeting Everest Base Camp and beyond
- Customized itineraries designed around your schedule, fitness level, and specific interests
- Expert local guides with certified altitude safety training and first aid qualifications
- Pre-trek orientation covering fitness benchmarks, altitude management, gear essentials, and cultural context
- Full logistics support including permits, teahouse bookings, porter services, and emergency protocols
- Sustainable and community-focused trekking programs that support local economies along every route
Start your preparation. We will handle the rest.
Contact Getaway Nepal Adventure to discuss your trek, your fitness level, and the right itinerary for your goals.
Recent Posts